Archive | April, 2015

Seedling propagating bed – two week update

19 Apr

First – there are seedlings growing!

S seedling bed improvements 002

And quite a lot of them. The first seedlings came up after about 7 days, and now there is at least one seedling growing in 215 of the 350 pots.

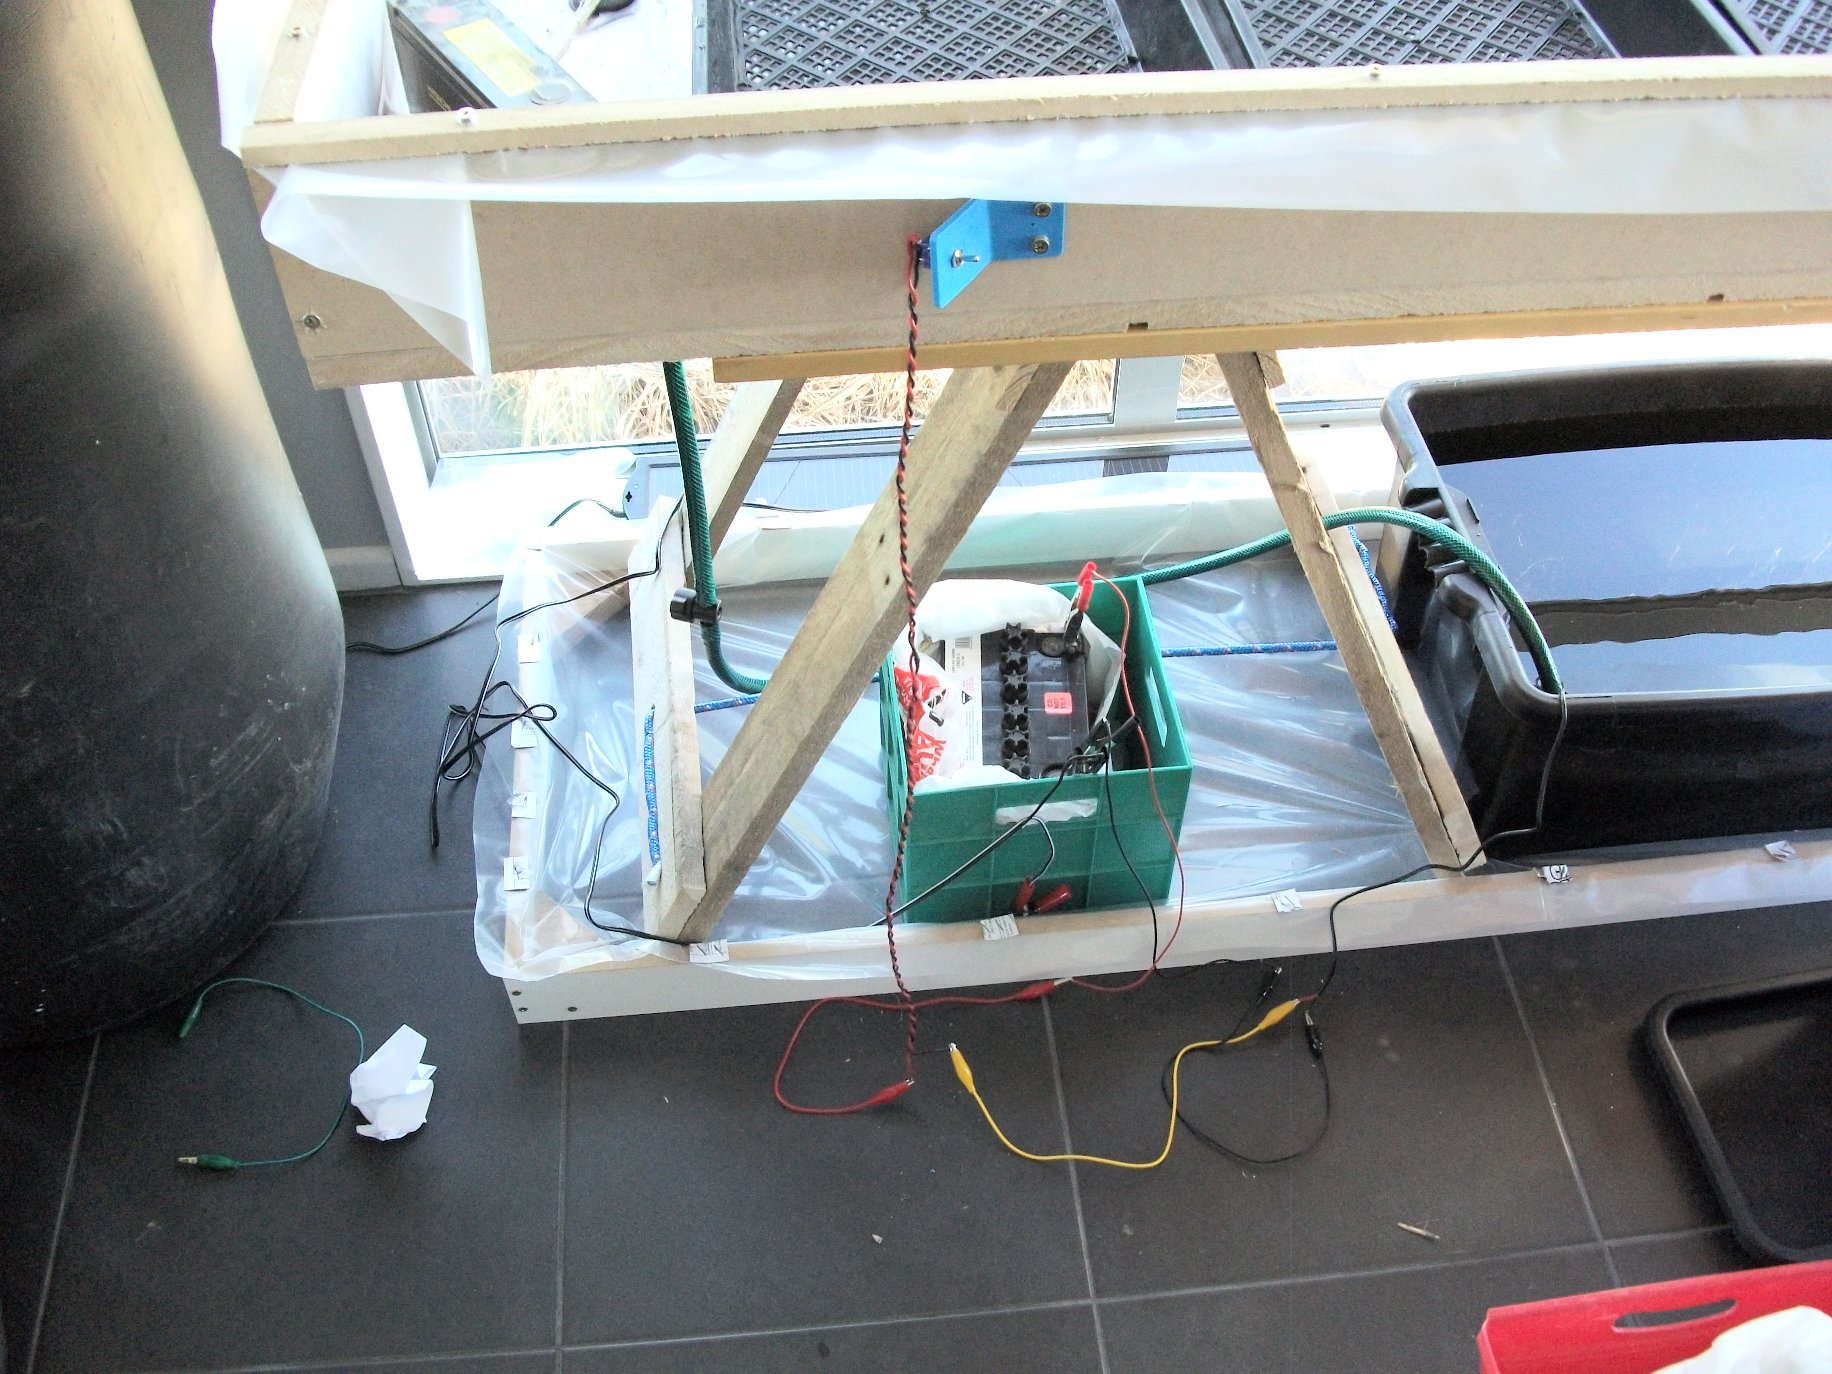
An automatic cutoff when the bed is flooded.

S seedling bed improvements 004

This is a simple float switch. When the float (a section of pool noodle) is lifted by the water, the wire rotates around a bearing and presses the microswitch which cuts off power to the pump. There’s a “control panel” visible to the left. Pressing the square button powers up a relay which turns on the pump, but it also supplies power to the relay so it keeps running after you take your finger off the button. When float rises, it cuts power to the relay which switches off, and stays off until pressing the button starts the cycle again. There’s also an override switch, a fuse, and an LED to light up.

FISH!

S seedling bed improvements 008

As the water flowed across the bed, then sat in the reservoir, it started forming algae. We started considering options to stop the buildup, then hit on the idea of advancing towards our eventual goal of aquaponics by adding a couple of fish to the system. We’ve always intended to have goldfish as part of the larger system we’re planning, but we had to do some furious research to see if it was workable.

The reservoir is renamed “the fish tank”

S seedling bed improvements 010

A visit to a pet shop netted us two quite small fish, some fish-food, a thermometer, and an air pump. I modified an old sieve by cutting holes for outlet pipes and wires, then placed two water pumps (the original pump and a smaller one) inside the sieve. A collection of stones from the beach at Birdlings Flat and a couple of chunks of brick all serve to hold the sieve firmly against the bottom of the tank. I’m fairly confident that the fish won’t be able to get near the pump intakes. The air pump is outside the tank, with a hose leading to the bottom of the tank. We used it before the fish moved in to make sure the water was well oxygenated but haven’t kept it up as (a) it was really too loud and vigorous, and (b) it ran off 240V whereas everything else is running off 12V (solar) power. As an alternative, the second (small) water pump inside the sieve feeds out to a hose which splashes water back into the tank, adding oxygen in the process.

The algae has gone, the fish seem happy, and they have definitely grown.

Anti-cat barrier and air circulation fans.

S seedling bed improvements 001

We strung some loose strands of bright 4mm rope on three sides to dissuade the cats from jumping up onto the seedlings. Seems to have worked so far.

We’re quite worried about “damping off”, the fungal disease(s) that like to destroy young seedlings. The seedling pots are quite moist and, while we haven’t had any problems so far, conditions are quite good for fungus to develop. Many sources recommend fans moving the air about to dry the top layer of soil, prevent stagnant moist air from sitting around, and also toughen up the young seedlings. I didn’t want to use a mains powered fan so I grabbed eight PC fans salvaged from various computers and hooked them up. They’re hooked up in pairs, with each pair joined in series so the fans, designed for 12V, only get half the voltage (6V) and turn over slowly and quietly. It took a surprising amount of time to hook them up but they seem to work very well. The biggest problem, and one that almost caught me out, is that each pair of fans should be of similar power. I was amazed how many different ratings there were in the my fan collection – each of the four pairs in use here is a quite different rating.

More controls

S seedling bed improvements 005

Each step we take seems to require more controls, especially adding the fish. I really need to add some timers to the system, and perhaps a water level detector for the fish tank. Perhaps a moisture detector to tell how damp the soil is. Lots of options. I’ve started working up a system based on an Arduino microcontroller.

A prototype seedling propagating tray

3 Apr

A recent project has been building a “flood and drain” bed for raising seedlings. It’s all rather rough and experimental, but showing promise.

S prototype seedling bed 001 - overview

Newspaper pots. Lots and lots (200 here, 350 when complete) of little biodegradable pots. Each group of 50 sits in a “seedling tray” which is has an open grid at the bottom.

The structure is built of 18mm MDF, with two layers of polythene sheet to make it waterproof. The polythene is trapped by a thin strip (18mm x 10mm) of mdf which is screwed down. That applies lots of even clamping pressure to the film so it doesn’t rip. Also visible is the hose that delivers water from the reservoir (currently a 50L “fish bin” just visible below the table).

S prototype seedling bed 003 - right
If the bed fills with water, there will be quite a bit of pressure trying to bend the walls outwards. I was going to put in cross braces, but ended up just using a strong method of fastening the walls. Vertical steel bolts (M6x65) come up through the base and into TAPPED holes in the walls. I recommend this technique for anyone who wants to really lock an mdf construction together. Note: the holes were drilled 5mm, then tapped with an ordinary M6 metal tap in a cordless drill. Very fast and very solid.

S prototype seedling bed 008 - tapped holes

This all sits on a chunk of material from an old office desk, which in turn rests on two homemade trestle legs (made from pallet wood). The tray is 2200mm x 600mm, and the walls are 100mm high. There are seven seed trays along the length, and an area at the extreme left which is where the drain is fitted.

S prototype seedling bed 004 - left

Inside the tray we routed some grooves along the base, hoping that the water would press the plastic down into the grooves and help to drain the bed smoothly. It didn’t. A simple work-around was to string some 4mm poly rope underneath the seed beds. This lifts them up enough that there is no water permanently pooled around the base.

S prototype seedling bed 006 - grooves

The seed trays don’t go all the way to the end. The last 200mm or so is routed down about 4mm deep to act as a drain, and has a “bulkhead fitting” installed to connect to a hosepipe. This was one of the points I was most worried about, as any leak here would get into the mdf and really damage it.

One of the things about polythene is that it’s really hard to glue to. Glue, or silicone caulking, won’t stick to it. I did some experiments with gluing a disk of plastic to the polythene which did work (light sanding, alcohol wipe, blowtorch at a distance to react free radicals with the surface layer) but in the end I decided to just trust the pressure fit of the rubber washer in the bulkhead fitting. So far (though it’s very early days) it’s been fine. If I build another one, I’ll epoxy a few inches of the mdf around the hole so it’s waterproof.

The bulkhead fitting is about 4mm high which prevents draining the last of the water away. Half a dozen pieces of ordinary string (held down by an old 12V battery which proved to work better as a heavy weight than as an electrical device) wicks the last of the water away perfectly. The plastic is dry at the end of the draining period.

S prototype seedling bed 007 - drain
DO NOT LOOK AT THE “TEMPORARY” WIRING!

Just in case a leak develops, the whole apparatus is sitting inside a rectangular ring of mdf, again with polythene inside to form a catch basin. The screwed down strips to hold down the plastic on the tray worked well – much better than simply stapling it as we did for the catch basin. Even when stapled through little bits of cardboard, the plastic rips free if you look at unkindly.

For safety, this is a solar powered setup, in this case with a hefty 12V battery intended for a lawn mower or similar ($100 from Super Cheap Auto). Just visible at the back (by the window) is a 1.8W 12V solar charger ($20 from The Warehouse).  I’ve actually got a proper solar panel and controller I can hook up if it needs it.

S prototype seedling bed 005 - wiring

The tray is a fraction longer than the support it rests on, leaving room for the bottom of the bulkhead fitting in the drain section. This leads into some perfectly ordinary domestic hosepipe. Partway down the hose is a tap fitting. This can restrict the speed with which the bed drains. The more it is closed down, the longer the ‘flood’ stage of watering lasts. Currently it takes a few minutes to fill the bed about 10mm deep with water, and about half an hour for that to completely drain away.

S prototype seedling bed 009 -  drain pipe and tap

Inside the reservoir is one of these, a 12V, 840L/hour, BRUSHLESS dc motor. The advantage of a brushless motor is that there are very few moving parts. Basically there’s some circuitry inside that turns DC into AC and uses that to spin the rotor. The supplier claims 30,000 hours operation, compared to some brushed dc motors (e.g. bilge pumps) that often fail after about 200 hours. There are lots of discussions about the problems of brushed dc motors on hydroponics websites. These were about $25 off Ebay.

S prototype seedling bed 010 - pump

If you wondered about the little paper pots, these are made from newspaper strips with the gadget shown here. It’s just a slightly tapered former with a hollow at the bottom and a handle, plus a matching base. I turned these (on a metal lathe) from some branches cut from our eucalyptus trees. There’s various instructions for making them on the net, or you can buy one (e.g. from here). The plan is to plant the seedling complete with the paper pot which should save a lot of fuss.

S prototype seedling bed 011 - maker
Hopefully I can put up an update in a few months to say whether all this worked. I have high hopes, but time will tell.